FilmCraft Vertical Video: Set Up and Export a 9:16 Sequence
Create a portrait sequence, reframe landscape clips shot by shot, position captions safely, and verify a matching vertical export.
Filmcraft · Updated
Loading guide…
A vertical video is a portrait composition, not merely a landscape file with a different export label. The project needs enough room for the subject, titles, and the destination application's interface. Set up the portrait sequence before refining the edit so the framing decisions reflect the final shape.
The example below uses a 9:16 sequence with a frame size of 1080 × 1920. Those dimensions are an example configuration, not a performance claim or a universal upload requirement. Confirm the intended destination's current specifications before delivery.
Create a sequence with the intended dimensions
Start a separate sequence or save a copy of an existing landscape project. Open Sequence → Sequence Settings… and inspect the General tab. Under Frame Size, set the horizontal dimension to 1080 and the vertical dimension to 1920. Read the displayed aspect ratio to confirm you have not reversed them.
Check the Timebase and use a frame rate appropriate to the footage and delivery. Do not increase the frame rate simply because the output is for a phone; changing the sequence time base changes motion sampling and can complicate an edit that already contains timed captions or graphics.
When adapting an existing sequence, inspect Scale motion effects proportionally when changing frame size before applying the change. FilmCraft exposes this option because existing Motion values may need adjustment. Save a revision first and inspect the result rather than assuming the checkbox will automatically make every landscape shot work in portrait.
2. Reframe every shot deliberately
Select a clip and use its Motion Scale and Position controls to compose the portrait frame. Choose between filling the frame and preserving the full image. Filling usually crops the sides of landscape footage; preserving everything may leave unused space. Make that editorial choice consciously instead of stretching the image to remove bars.
For a talking head, keep the face and relevant gestures visible through the entire shot. For a product demonstration, check the hands and the object at the moment of the important action. A center crop that looks acceptable on the first frame may lose the subject when they move.
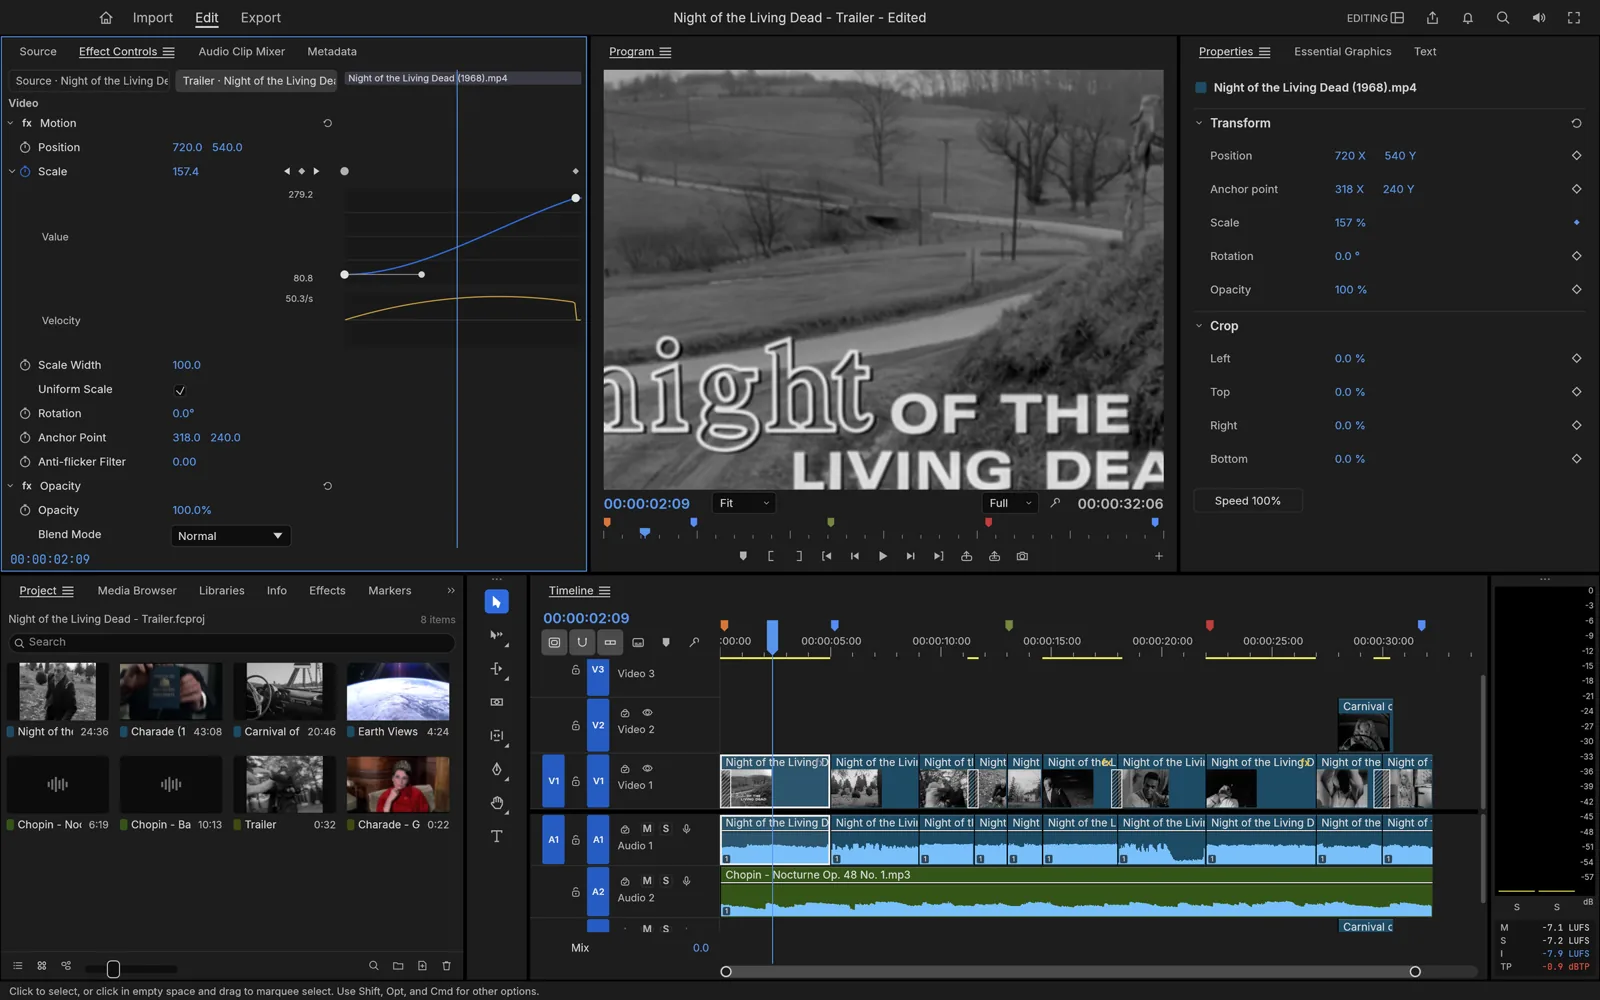
If the subject travels, animate Position with a small number of deliberate keyframes. Follow the three-step keyframe guide, then play the shot at normal speed. Avoid unnecessary motion that makes the framing feel as though it is chasing the subject.
Motion controls can reframe a clip or animate its position. This workspace
image is a control reference, not a portrait output preview.
3. Rebuild text for the narrower frame
Review every title, lower third, and caption after changing the sequence dimensions. Long lines that worked in landscape can become tiny or extend beyond the portrait frame. Rewrite line breaks and adjust placement rather than shrinking the entire graphic until it is unreadable.
Keep important text away from the outer edges and from areas likely to be covered by the destination's buttons, description, or account information. Interface overlays vary, so inspect a private preview or draft in the destination application when available. Do not treat one generic safe-area rectangle as a permanent specification for every platform.
If delivering captions, decide whether to use a sidecar file or burn them into the picture. The SRT guide explains how to avoid exporting a clean video when permanent text was intended, or accidentally delivering both burned-in and selectable copies of the same captions.
Export matching dimensions and verify the actual file
In Export, confirm the intended sequence, range, portrait frame size, frame rate, and audio layout. A saved landscape preset can override the dimensions you just established, so inspect the fields rather than relying on its name. Choose a delivery format accepted by the destination; the export guide explains H.264 and intermediate choices.
Open the output outside FilmCraft. Check that the file itself is portrait, that no unexpected bars or stretching appear, and that titles remain readable at a realistic viewing size. Inspect the beginning, end, and shots with subject movement. Keep the portrait project revision so future changes do not require rebuilding the crop from a flattened export.