FilmCraft Color Management: Read Waveforms and Vectorscopes
Set a consistent color workflow, inspect source interpretation, and use scopes to balance exposure and color before checking your export.
Filmcraft · Updated
Loading guide…
Color correction is easier when you separate source interpretation, sequence processing, and creative adjustments. If footage is interpreted incorrectly, moving contrast and saturation sliders may disguise the problem in one shot while making the next shot worse. Begin with a known delivery goal, then use scopes alongside the picture.
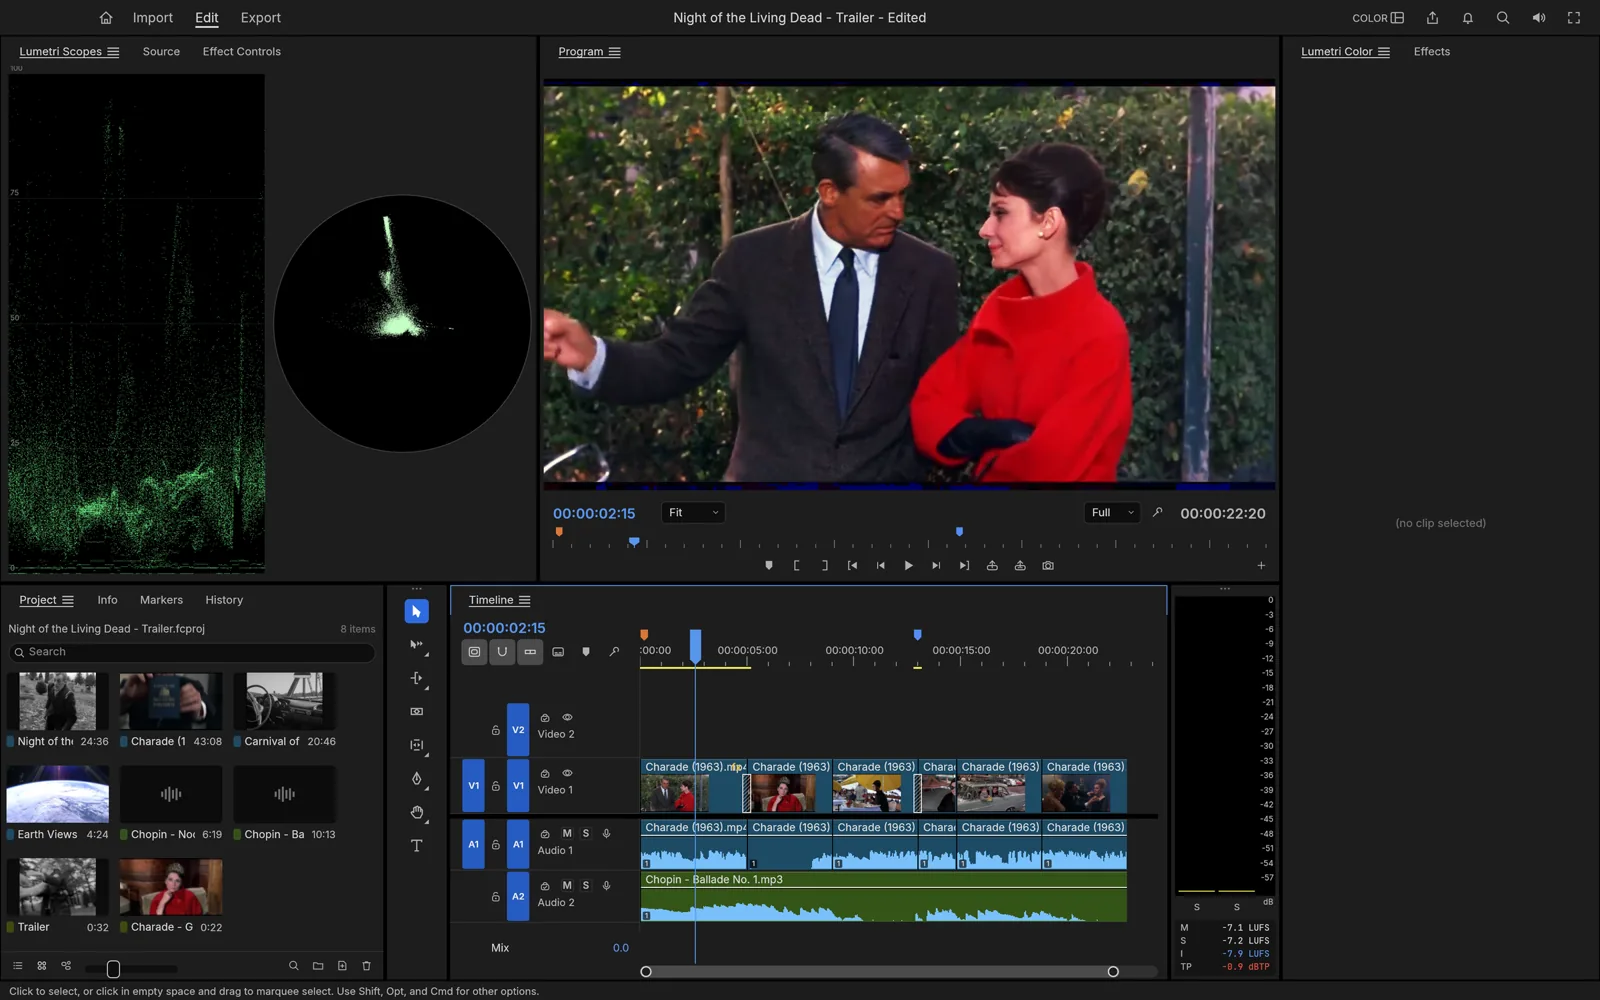
FilmCraft v0.20.1 documents a color-managed pipeline and live waveform and vectorscope displays calculated from the graded frame. These tools provide evidence about the image signal; they do not replace viewing the result on an appropriate display or checking the exported file.
Establish a consistent color pipeline
For an ordinary SDR delivery, start with a consistent SDR working setup appropriate to the destination. Open Sequence → Sequence Settings… → Color Management to inspect the Working Color Space and the Auto Tone Map Media (HDR and log into SDR) option. A wide-gamut checkbox is not a general “better quality” switch; changing the pipeline changes how colors are processed.
Inspect unusual-looking source footage before grading it. Clip → Modify → Interpret Footage… includes color-management controls. Use a source-color override only when you know how the camera or recording application encoded the file. A flat log image and an incorrectly interpreted image are not interchangeable diagnoses.
When mixing log, HDR, and ordinary SDR clips, document the intended interpretation and conversion. Avoid stacking an input conversion LUT on top of an automatic conversion without checking whether both are doing the same job. Save a project revision before changing the pipeline across an existing grade.
Read the waveform as an exposure map
Open the Color workspace and display the scopes. The waveform spreads the image horizontally while plotting signal level vertically. It helps you locate bright and dark areas and see whether a correction compresses or clips their range. The exact scale and interpretation depend on the working and viewing setup, so first read the scope labels rather than memorizing a universal target.
Choose a frame with meaningful highlights and shadows. Adjust exposure or tonal controls while watching both the waveform and the Program monitor. A flat concentration at a boundary can suggest clipping, but a deliberately solid graphic or dark background may also produce a simple pattern. Inspect actual subject detail before deciding that every flat area needs correction.
Do not force every shot to fill the entire scope. A night scene, a foggy landscape, and a bright studio interview should not automatically have the same tonal distribution. Preserve the intended lighting while correcting distracting discontinuities between adjacent shots.
Read the scopes beside the image. The scene's lighting and content explain
what the signal distribution means.
Use the vectorscope to inspect color and saturation
The vectorscope plots chroma direction and strength. Movement farther from the center generally indicates stronger saturation; direction indicates the color family. Compare a known neutral surface and the subject's appearance while adjusting white balance. A scene filled with a colored wall can pull the overall trace without proving that the shot has a color cast.
Make restrained changes and toggle the correction to compare before and after. Watch for bright clothing or signage becoming distracting while trying to improve a face. A skin-tone reference can help investigation, but it is not a requirement to push every complexion and lighting condition onto one identical line.
Match neighboring shots and check delivery
Pick a reference shot, then compare adjacent shots at similar moments. Balance exposure and white balance before adding a creative look. Revisit the scopes after saturation, curves, or LUT changes because those adjustments can alter the signal you previously balanced.
Export a sample through the intended delivery settings and view it outside the editor. If it differs substantially, check output interpretation, player behavior, and the display setup before regrading the entire sequence. Record the settings used for the accepted version so a later revision follows the same pipeline.